

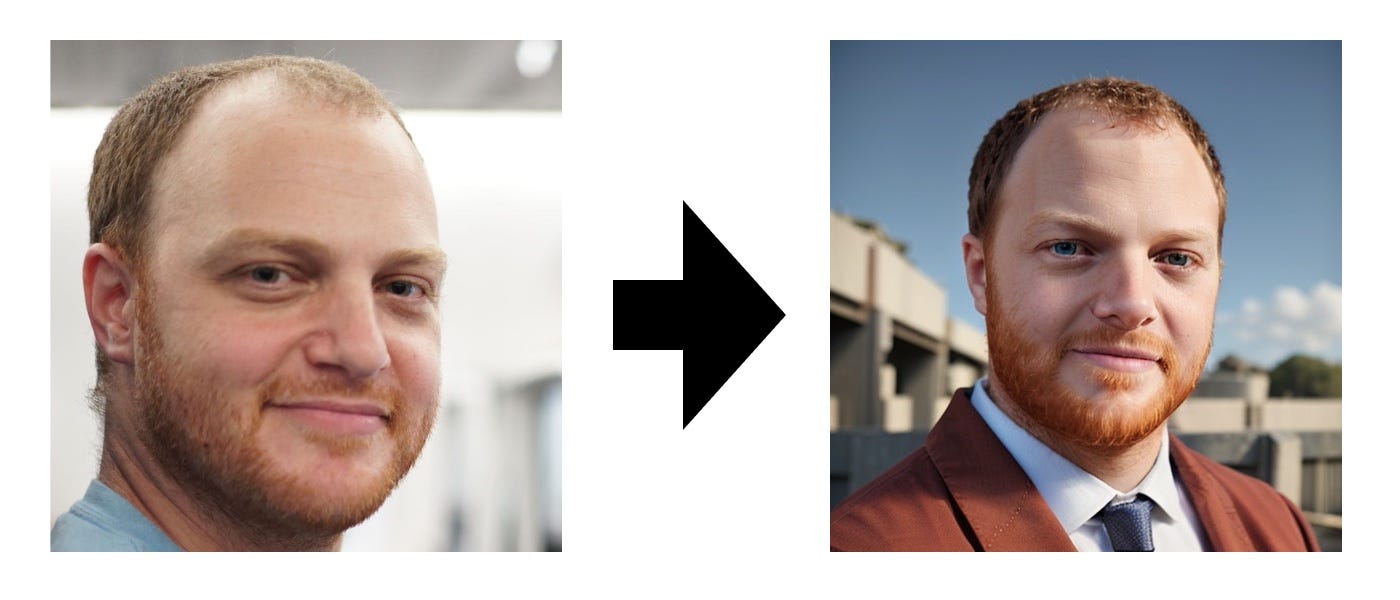
AI Profile Pictures with Google Colab
How to generate those fancy profile pictures but without paying anything

Google Colab gives you a free GPU on the cloud, which allows us to use Stable Diffusion to generate images. All we have to do is download a model, train it with captioned images, so the model knows our name, and then ask the model to generate a new image with a prompt that includes the new caption we just taught it. This is a guide on how to do that.
1. Get the colab
2. Gather profile pictures
Create an empty folder and save in it profile pictures you’ll later use for training the model to recognize your name.
Make all the files have the same extension (like jpg). Don’t mix png/jpg/jpeg files.
Rename all the files to
[yourname][number].jpg. That’s how you teach the model your name. For example: ubsa1.jpg, ubsa2.jpg, ubsa3.jpg, …, ubsa10.jpg. Then later we’ll give the AI a prompt like “A painting of ubsa as a buff warrior”.To make sure the model is training on your face and not the rest of the image: prefer clear closeups with neutral background, varied facial expressions, no other people or background noise, no hats, sunglasses, face paint, etc.
3. Run the colab
There are little play buttons that you have to click to run in the Colab. See image.

Steps you’ll need to run in the Colab:
`
from google.colab import drive` - This will authorize uploading and downloading the pictures and AI model files on your Google Drive. You’ll need to allow “Google Drive for desktop” to access your Google Drive. If that seems confusing - just imagine the Colab itself is running on a desktop in the cloud.Dependencies - this will load what Python needs to run the model
Model Download - this will get the pretrained AI model
Create/Load a Session - the “session_name” you’ll have to fill out is the folder’s name in gdrive. Use something short and simple you can use to later find it in gdrive like “
aidream”Instance Images - here you’ll upload your image files. After you run this cell, you can click the button that shows up at the bottom of the cell to open the file selection dialog.
Captions - skip this cell (our file names are the captions).
Concept Images - skip this cell.
Training - this took 16 minutes for me. The AI model will be learning your face
Test the Trained Model - this took 3 minutes. Running this cell will show you a URL to a webapp on gradio. Click the link that looks like
Running on public URL: https://7501b599123d.gradio.app
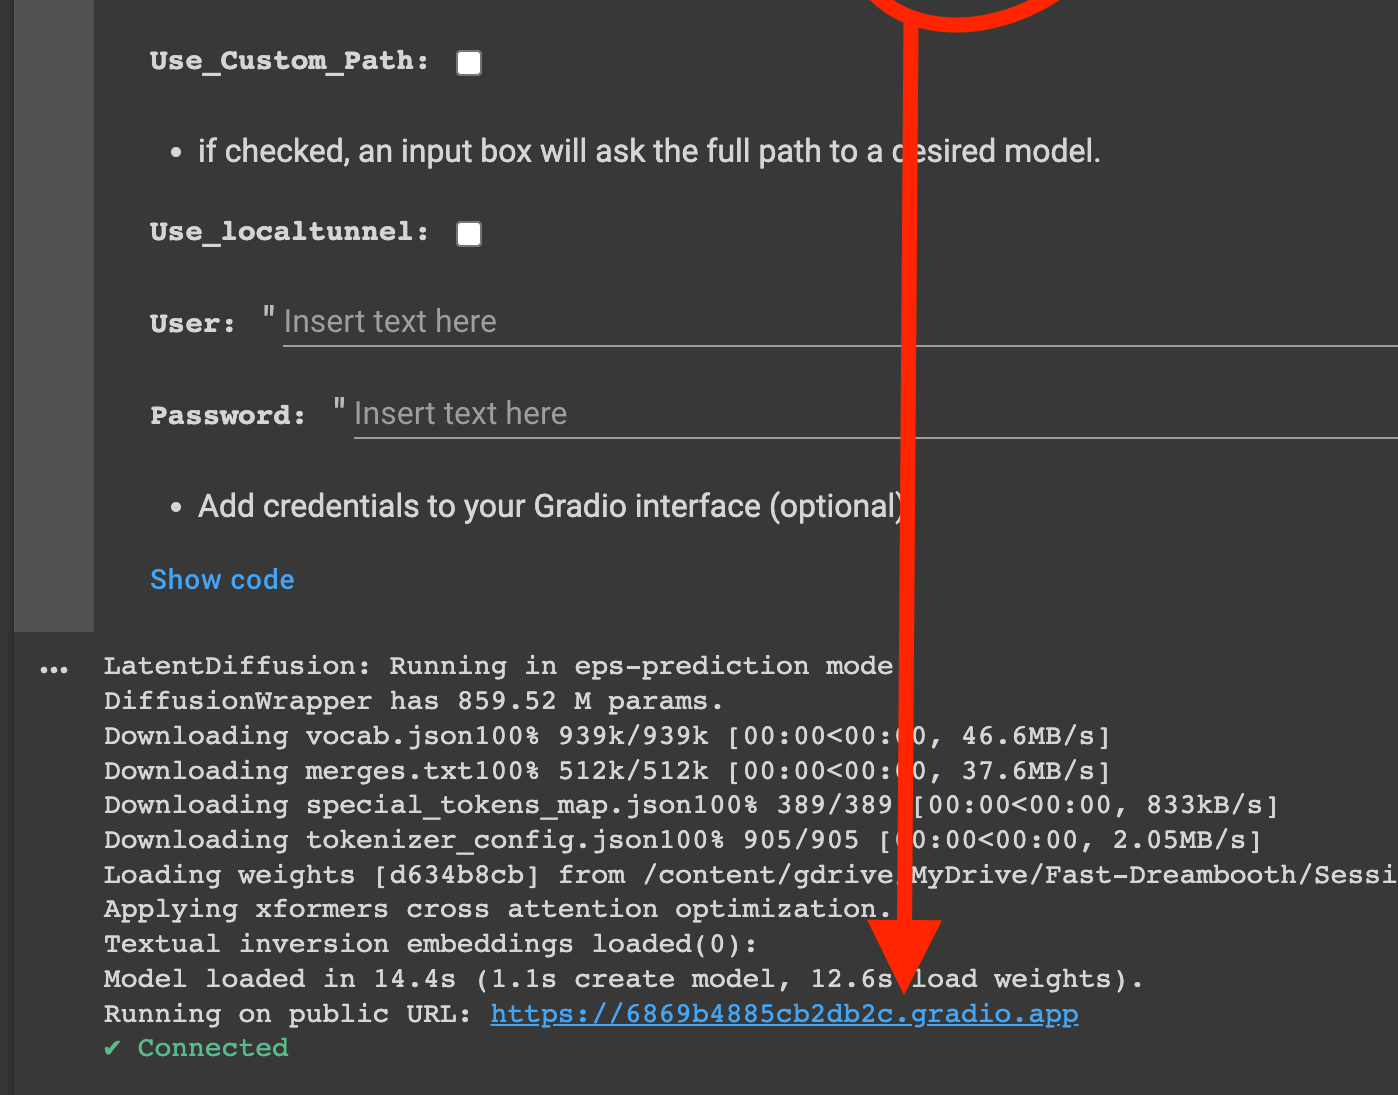
And now you can give prompts and get images by clicking “Generate”.

Errors you might encounter
Inside the colab you might get error messages. You should try and read them to see if you can figure out what went wrong and how to fix it. Also feel free to tweet at me such occasions and I’ll try and take a look.
Prompts
If you need ideas for prompts, try out these: https://mpost.io/best-100-stable-diffusion-prompts-the-most-beautiful-ai-text-to-image-prompts/. Also please know that about 75% of the images I’ve been getting were completely unusable. You have to keep tweaking those prompts and trying again until you find something you like. The AI doesn’t understand our sense of aesthetics, and often rendered my face in a way that almost looked like me but only in a creepy way.

Settings
You might want to tweak some of the settings on gradio. I’ve been using the “DDIM” sampling method with 50 sampling steps, per advice from the blog post where I learned this. Though there are probably even better settings. So have fun, and please let me know if you find better settings at https://twitter.com/ubershmekel